Power Cutting Tools

Power Cutting Tools

Power Cutting Tools

This is an excerpt from the Book called “Interior Walls, Framing, Dry walling, Trimming by Des Moines, Lowa. Continue reading to learn more about Power Cutting Tools, thanks to the author.

There are four types of power saws that will accomplish almost everything you’ll need to do. The most useful is a circular saw. It will crosscut lumber and plywood to the right size, making straight cuts with ease. The most common saw uses a blade with a diameter of 7 ½ inches. Most come with steel-tipped combination blade adequate for all the projects in this book. Street blades dull quickly, though, so purchase a more durable carbide-tipped combination blade as a replacement. If you buy only one power saw this is the one to get. 

A jigsaw (sometimes called a saber saw also crosscuts and Rips lumber though not as last as a circular saw. Its chief characteristic is its ability to cut curves. Some models feature variable speed control, which is handy for cutting materials ether than wood such as plastic or metal other than wood, such as plastic or metal. Some saber saws lecture orbital cutting the some saber saws feature orbital cutting; the blade moves forward and back in addition to up and down, making the saw cut much faster than one without orbital action.  

A reciprocating saw is handy for demolition work. It utilizes a variety if blades with tooth designed to cut different materials, including wood, nails, screws, and even steel popes. Its blade can reach into tight places to make a cut, such as between framing members.

A power miter saw, also called a chop saw, is a stationary circular saw. While it makes clean crosscuts, its greatest strength is in making accurate miter (angles) cuts. If you have a lot of trim pieces to cut and install, a chop saw is the tool to use.  

Circular Saw 

 Buying One That’s Right For You  

There are dozens of models of circular saws on the market. Here are some tips for selecting the one that’s right for you.

First, you probably don’t need a worm-drive saw. These heavy relatively expensive tools are designed to withstand all-day framing jobs. They feature a worm gear that places the motor behind the shaft that drives the blade. This makes it easy to see where the blade is cutting but awkward for novices to use. Instead look for a good-quality “sidewinder” so named because the motor shaft is aligned beside the blade and drives the blade directly.

Circular Saw 
Circular Saw 

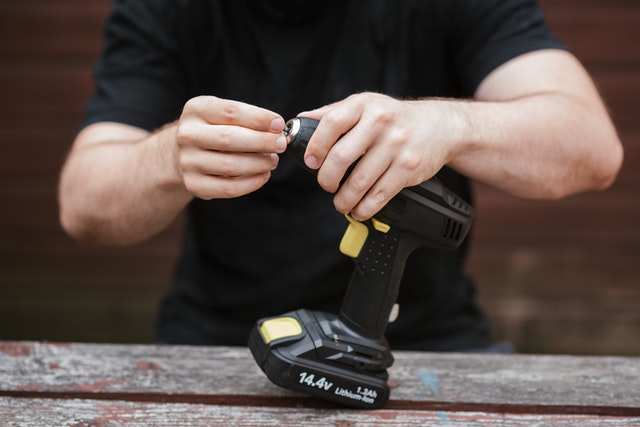
Sidewinders are much lighter and easier to handle than worm-drive saws. Various models have the blasé on either side. Find the model most comfortable to you. A good one will easily handle any project in this book.   

Second, don’t concern yourself with a saw’s horsepower rating, which is usually measured when the saw is not under load. A better indication of a saw’s are rated at 9 or 10 amps, find a saw rated at least l2 or 13 amps.  

The saw should have a solid extruded or cast base rather than a stamped street base. Check that the tilt and height adjustments work smoothly and tighten, easily and firmly. Cast wing nuts stay tight more easily than the stamped wing nuts on cheaper saws. Levers work even better.  

Finally make sure the saw is comfortable to use. If you can try different saws at the store make some test cuts. Make sure you like the group and the position of the switch and safety guard level.  

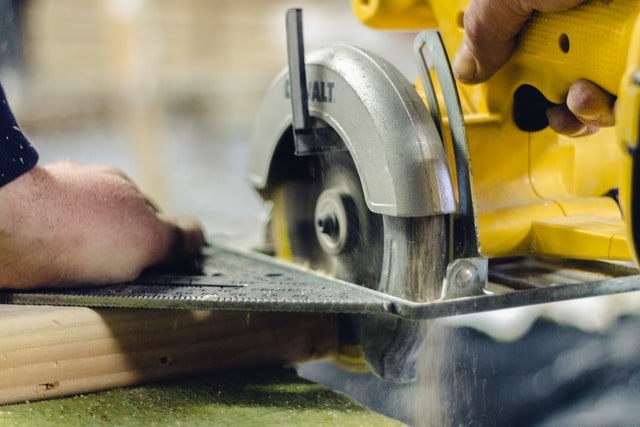
Using A Circular Saw 

Crosscutting: To make a crosscut with a circular saw, draw a line across the piece, then cut on the waste side of the line. Support the piece so the waste fails freely away from the blade. The wider part of the saw’s base (or shoe) rides on the part of the board is supported.  

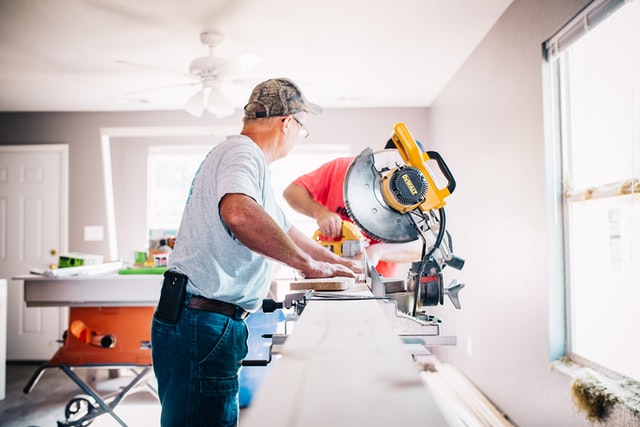
Guided crosscutting: If you need a particularly precise cut, use a layout square as a guide. Line up the blade with the cut at the edge board. Then hold the square arcos the board with one edge against the side of the saw base. Push the saw along the square to make the cut.  

Cutting plywood: Marking your layout lines with a chalk line. Support both sides of the cut with a series of 2×4s on a pair of sawhorses. Clamp a straightedge or board on the piece as a guide for the bottom plate of the circular saw. Set the saw to cut slightly deeper than the plywood thickness.  

 Safety First  

Preventing Accidents And Injuries 

The important of safety for home improvement and remodeling [rejects cannot be overemphasized. Mistakes can have serious consequences. Before starting any project, review all the steps involved. If you are uncomfortable with any procedure, find a carpenter or the knowledge person to help you.  

 Safety equipment should be among the first tools you purchase. Start with a pair of safety glasses or goggles. If you wear prescription glasses, get goggles, that fit over them or invest in a pair of prescription safety glasses. Try them on before purchasing and, find a pair that is comfortable so you won’t mind wearing them whenever you’re working. Make a habit of wearing safety glasses all the time, period that way you won’t be tempos to make “just one quick cut” without them.  

Next up is hearing protection. There are many types of earplugs and earmuffs available. Earmuffs provide more complete protection. Again try them on it possible to test for comfort.  

Dust masks are necessary during demotion and drywall finishing. Check the label before you buy and match the mask to the type of work you are doing. In general masks with a single strap are rated for nuisance dust.  

These keep sawdust out of your lungs. For sanding drywall or ripping out plaster, you’ll want a mask rated for fine dust. These thicker masks usually have two straps.  

Protect your hands with work gloves when handling work such as unloading materials, demolition and cleaning up debus do not wear them when you are working with power tools. You are more likely to lose your grip or fumble a tool or piece with gloves on. In addition, gloves may get caught in spinning blade or drill bit.   

Finally, it is always a good idea to have a first aid kit on hand.  

There are two basic types of cuts to make using a circular saw a cross cut which runs across the grain; and a tip cut which runs with the grain. No matter what type of cut your making for best results it should be straight. 

The simple homework cutting guide here helps your produce straight accurate cuts with your circular saw. It is made from a piece of ¼-inch, plywood and a straight length of ½-inch –thick stock. You can make the guide any length you like up to 8 feet long for cutting sheets of plywood.  

Rip Cuts 

Cutting The Long Way 

If you need to rip-cut boards, (for example to make 4-inch-wide baseboards from 1×6s), use a rip guide accessory available for all circular saws. To make the cut, clamp the board securely across two sawnorses. Set the guide to the required width. Keep the guide firmly against the board.

Cutting The Long Way 

Making Your Own Cutting Guide 

  1. Start with a piece of ¼-inch plywood that is at least 2 ½- inches wider than the base of your circular saw. Glue and screw a 2-inch-wude strip of ½ -inch –thick stock flush to the long edge of the plywood.  
  2. Clamp the guide to a pair of sawhorses or on a bench. Place the saw base against the ½ -inch stock and run the saw down the plywood, cutting it to the width. Make sure the blade won’t cut the bench or horses.  
  3. To use the guide, clamp it to your work piece with the sawed edge along a marked cut line. Guide the saw along the ½-inch stock to make the cut. 

Safety First 

 Setting The Correct Depth Of Cut 

When cutting with a circular saw, set the depth of cut so the blade extends through the maternal plus the depth of the teeth. This keeps the amount of exposed blade to a minimum while allowing the blade to cut efficiently. If the teeth reach just barely through the material, the blade may heat excessively and bind in the cut. As you are sawing remember that the teeth reach past the underside of the board. Keep fingers, power cords, and other materials clear. 

DRILLING AND SHAPING TOOLS  

Along with power saws, you also will need a power drill or two and an assortment of bits and cutters for making holes. The tool to start with is a corded variable-speed, reversible (VSR) drill, with a 3/8-inch-diameter chuck. This tool handles 90 percent of your drilling needs. Along with the drill, purchase a set of twist drill bits, used for boring things such as pilot holes for screws. For larger holes, a set of spade bits does the trick. For really large holes, such as those for a lockset in a door, use a hole saw, which fits into a drill.  

The next drill to acquire is a cordless drill/driver, which comes in a variety of voltages ranging from around 7 to 24. The higher the voltage, the more powerful the tool (and the more money it costs). For most remodeling, a 14-volt model is deal. Spend a little more money of purchase an extra rechargeable battery, so the drill won’t run out of power in the middle of a project. A cordless drill/driver is handy for odd jobs and is probably most useful as a power screwdriver, especially when hanging drywall. To equip a drill as a screwdriver, buy a magnetic bit holder and a variety of screwdriver bits.  

One of the nicest features most cordless drill/driver to slip out of gear when it reaches a certain amount of torque. This helps prevent overdriving screws and stripping out the holes or the screwheads.  

A router and a variety of router bits are useful for shaping decorative moldings and cutting mortises for door hinges.  

Getting the most out of a drill/driver and router 

Clutch adjustment: To keep from over- or underdriving screws, adjust the clutch on a cordless drill/driver. Start with a setting that is a little too light, then gradually increase it until the tool slips when the screw is at the proper depth.  

Decorative cuts: Invest in a few edge-forming bits and you can use a router to create almost any molding shape you want. Most edge formers come equipped with a ball-bearing pilot that rides along the edge of the workpiece.  

Hinge mortising: Use a ½-inch straight bit to rout mortises for door hinges. You can even purchase hinges with rounded corners that match the radius of the bit, saving you the job of squaring the corners of the mortise. 

FINISHING TOOLS  
FINISHING TOOLS  

Pro tip: Predrill screw holes to prevent splitting  

When you drive a screw without a pilot hole, there are four potential outcomes, three of them bad if the screw hits a knot or other odd grain in the wood, the head of the screw might twist off, you might overdrive the screw, stripping the hold it has in the wood or the wood might split. Of course, the drew could go in properly, but don’t take chances. Always drill pilot holes.  

If appearance is important, you may want to countersink or counterbore the hole.  

Countersinking makes a shallow depression at the top of the screw hole so the screw head can be driven flush without crushing wood fibers at the surface. Counterboring goes even deeper, you cover the screw head with a wooden plug.  

Counterboring and countersinking attachment that fits over a regular drill bit. Sized for various screw head, the attachments allow you to adjust the predrilling depth.  

Lay out the center of the hole with an X. Mark the exact center of the X with an awl to keep the drill bit from wandering off target.  

To select the proper size bit for a pilot hole, hold the bit front of the screw. Match the diameter of the bit to the minor diameter of the screw, that is, the diameter of the screw minus the depth of the threads.  

FINISHING TOOLS  

Installing and finishing drywall and repairing plaster requires a specialized set of tools. For laying out and guiding the cuts on a sheet of drywall, nothing beats a drywall square. After laying out the cut lines, make them with a utility knife. For interior cutouts, such as those around electrical boxes, use a jab saw to plunge through the drywall and saw out the scrap piece. For slight trimming, such as when you want to plane an edge flush at a corner, use a Surform plane.  

Once the drywall is installed, the finishing process begins with spreading joint compound over the fasteners, and taping and spreading compound across the joints between the drywall sheets. The tools used for spreading the compound are called taping or drywall knives. These come in a variety of widths. For most purposes a 6-inch, a 10-inch, and a 12-inch will handle the task. Along with the knives, get a mud pan to carry a supply of joint compound (often called “mud”).  

The final stage of finishing drywall consists of smoothing the dried compound. The traditional method involves sanding with abrasive paper, which is fine for small jobs. For larger expanses of drywall, invest in sanding screens and a holder to mount them on. Some holder models have a dust pickup that attaches to the hose of a shop vacuum. Be sure to replace the filter in your vacuum with one designed to handle drywall dust. For an almost dust-free environment, smooth the walls with a drywall sponge, which has a tough abrasive plastic layer laminated to one side.  

Power Cutting Tools

(650) 249-9744


[contact-form-7 id=”54″ title=”Quote Form”]

Leave a Comment

Your email address will not be published. Required fields are marked *