Design and Plan tiny home

Design and Plan tiny home

Design and Plan tiny home

This is an excerpt from the Book called “Tiny House Design & Construction Guide” by Dan Louche. Continue reading to learn more about Design and Plan tiny home, thanks to the author.

DESIGN & PLANS 

Before any construction can begin on your tiny house, you will need to decide on a design. 

The design that you select for your house can either be your own custom design, an existing design, or a combination of the two. 

CUSTOM DESIGN 

Coming up with your own custom design allows you to create a house to your exact specification. The size restrictions imposed on tiny houses on wheels can be restrictive, but can also make them easier to design. If you were given a blank page and asked to design your perfect house, you may feel pretty intimidated. Instead, if you were given a specifically sized box and told to arrange and fit specific items within it, this would feel a lot less daunting. Sometimes having too many choices can be crippling. 

DESIGN & PLANS 
DESIGN & PLANS 

The difficultly part of designing your own house from scratch is that it requires a lot of knowledge that you may not already possess and that may take a lot of time to acquire. You will need to know how to best take advantage of small spaces, proper framing and building techniques, and how to use the technology that can capture and document your design. 

DESIGNING FOR SMALL SPACES 

The key to a successful interior design in a tiny house is having the space and storage for all your belongings, while also having an open, roomy feel. Achieving these two seemingly conflicting goals in such a small space can be overwhelming, especially if you are currently living in a conventional home that has all the belongings that typically go with it. If you have already began downsizing to remove the excess, you will find this process easier. 

HOUSE LAYOUT 

How you lay out your house is going to determine how open and how functional it is. You will want to research and experiment as much as possible before finalizing the design. 

 A great resource for tiny hose layouts is the RV industry. While tiny houses are relatively new, RV’s have been around for over 100 years. In that time, the various manufacturers have experimented and perfected different layouts based on customer feedback. While the goals of someone who wants to go camping and the goals of someone who wants to live in a structure full-time may not perfectly align, there is still a lot that can be learned. It would be well worth the time to look through the various RV floor plans and even go to an RV dealer or RV show and see them firsthand. In doing so, you will see commonalities in many of the designs that should be considered for your house. For instance, you may notice that all of the doors to the living areas on RV’s are located on the passenger side of the vehicle. This is so that when they are parked on the street, people enter and exit at the curb and not into traffic. Due to this consistency in design, all RV parks are expecting the doors to be on the passenger side and the utility hook-ups to be on the opposite side. If you buck this trend and end up parking your tiny house in an RV park, you may find that your front door is located right in front of the sewer hookup at the park. 

As tiny houses are becoming more popular, these new designs can be a great resource. Do not just look at the pictures though. Delve deeper into the interviews and blogs, where tiny house owners discuss what they do and do not like about their hose design. There will surely be things that sounded like a great idea during the design stage, but turned out to be not as practical or functional. This is especially true for the participants of tiny house TV show. Many of their design decisions are not made by the homeowners and are purely for visual impact. The downsides to these elements would never be brought up on the show, but I have heard more that in one participant say they would have done several things differently. 

 One of the most significant decisions that is made when designing a tiny house is the location of the bathroom and the kitchen. While some choices concerning a house’s layout can be changed after the house is built, like a cabinet’s location or the need for an additional bookcase, the location of the bathroom and kitchen cannot. This is because the windows and plumbing for these rooms are uniquely positioned making them very difficult to relocate. Below are two common layout choices and some pros and cons of each. 

BATHROOM ALONG SHORT WALL 

The bathroom fits very well along the short wall of a tiny hose. If you shower and toilet are across from each other and they measure 36 inches and 28 inches respectively, that leaves a good amount of open space to move around comfortably between the two. 

If the kitchen is located directly outside the bathroom, the countertop can be split between the two sides of the hose creating a galley kitchen. This is an efficient kitchen design as it requires less movement while preparing meals. It also opens the kitchen up to the rest of the house which can make the whole house feel larger. 

The downside is that some people prefer a longer countertop in their kitchen rather that two shorter countertops, regardless of how open it is to the rest of the house. 

BATHROOM ALONG LONG WALL 

Having the bathroom along the longer wall of the house and the kitchen across form it is another option. If you are someone who prefers a longer continuous countertop in your kitchen, then this may be a better option for you.

countertops
countertops

One downside to this layout is that it may feel more confines. Since the kitchen will be between the exterior wall and the bathroom, it will not feel as open assuming that your shower is 36 inches wide, the interior wall thickness is 4 inches, and the countertop is 25 inches, then a tiny house with 7 feet of interior width would only have about 19, between the interior wall and the countertop. That might feel tight while working in the kitchen. To gain some additional room you could get a smaller shower and build a more narrow bathroom. Alternatively, you could make your countertops narrower and install a smaller sink. A slimmer countertop would also require a shallow refrigerator if placing it under the countertop either way, compromises may need to be made with this configuration. 

When deciding on the bathroom location, you should also consider the location of the fenders on the trailer. On wider houses, it is common for the fenders to enter the living area slightly. If your bathroom overlaps the fenders, then your shower may need to be built around them. This would limit the use of some shower materials such as a one piece fiberglass shower. 

MICRO-HALLWAYS 

You will want to avoid including a micro-hallway in your tiny house design. I is very easy to identify a hallway in a traditional house, it is an interior passage whose purpose is to provide a way to get from one room of a house to another. A micro-hallway is a little more difficult to pot. It is any area of a house that would likely only be used to get from one part of a tiny house to another. It is essentially a hallway without the enclosure. You might be asking yourself,” who would put a hallway in a tiny house?,” but they are more common than you might think. In some cases they are built into the design and structure of a house, and in other cases they are created by the placement of furniture. When designing your tiny house, try to minimize any floor space that would only be used to a pass through or stood in for a few moments. 

The areas indicated on the diagrams to the left are examples of micro-hallways. 

FRAMING AND BUILDING BASICS 

Once you have your layout and floorplan, you will need to create plans that you can build from. To do this, you will need to understand the proper way to frame a house so that your plans are structurally sound. While this can be extremely complicated in larger structures, it is much less difficult for a tiny house. 

STRUCTURAL LOADS 

There are forces or ‘loads’ that a tiny house encounters and must withstand. Some of these loads are the result of gravity, while others are caused by wind or movement, such as when the house is towed. If your house cannot handle these loads, it can experience a failure that results in a collapse. 

In a ‘stick built’ tiny house, the framing is made up primarily of 2×4 (said‘two-by four’) lumber, it is important to note that while they are called 2×4’s, the dimensions are actually 1 ½ inches by 3 ½ inches (see the chapter on materials for additional information)/ when a 2×4 is told up in a vertical orientation it is very strong and efficient at supporting loads form above. When used in a wall, these 2×4’s are referred to as ‘studs’. For a stud to be efficient at properly carrying a load. It needs to be consistent form the top of the wall to the bottom. This is called the load path. 

If a stud cannot be consistent from the top of the wall to the bottom, for instance when a window or door requires a break in the stud, then the load path needs to be redirected around the opening. This is done through the use of a header. A header is a structural support made up of ‘two-by’ lumber that bridges an opening. The size of the span that needs to be bridged determines the size of the lumber that the header is constructed of. See the table below for the proper sizing. 

Headers above openings are only required in load-bearing walls. We will cover how to construct a header in the chapter on framing. 

 If the load path is not consistent, then deflection can occur. Deflection is when the framing members bend under a load. If the deflection so too much and the framing member fails, then the structure can partially or fully collapse. Even a small amount of deflection can cause problems like cracks in wall, bulging windows, and difficult to open doors and windows. 

The diagram to the right illustrates show studs are used in a wall to provide support. 

LOAD-BEARING CANTILEVERS 

A tiny house is often wider that the trailer that it is built on. When this occurs, the house subfloor will cantilever, or overhang the edge of the trailer. Because the subfloor then supports the walls of your house, it is considered a load-beating cantilever. Load-bearing cantilevers should extend or overhang no more than the depth of the floor joist. 

ADVANCED FRAMING TECHNIQUES 

In recent years, framing methods have in proved to make housed more energy efficient. These changes are called ‘Advanced Framing Techniques’. The use of the term ‘Advanced’ tramping. They are new ways to frame that reduce the amount of wood in a wall, in cred the amount of insulation, and ensure that no ‘pockets’ are created that can be diffused are some significant improvements that do apply, including: 

24 INCH ON-CENTER STUDS. Studs in a house are generally placed either 16 or 24 inches apart from their center (called on- center). Since the wood that studs are made of is a god insulator, it is desirable to have the minimum number of them in your was possible while still providing sufficient support. For a smaller structure like a tiny how 24 inches apart is adequate. 

Design and Plan tiny home

SINGLE TOP PLATE. Older framing methods utilize two top plates in a wall to support weight of any rafters that may be located between the studs. The two top plates a form of header. However, by lining up the rafters so they make contact with the plate at the same location the studs make contact, the weight of the roof is transfer directly to the studs and only a single top plate is required. 

IMPROVED CORNER DESIGN. In older framing, the corners involved more wood and way they were constructed actually created a hidden pocket that, unless drilled into injected with insulation, would often go uninsulated. The new design uses less and is easily insulated. 

OPTIMIZED WINDOW PLACEMENT. If possible, position windows so that one side of them is against an existing stud. Then, only one additional stud needs to be framed around each window. This can be difficult to do on a tiny house, since there is not normally a lot of flexibility in a window’s placement. 

REDUCED WOOD AROUND OPENINGS. In older framing, more wood was used as support around window and door openings than was required. Load tests show the much less wood than was traditionally being used is necessary to support the loads in these areas. 

For additional information on proper building and framing standards, consult the internationals building code (IBC). For additional information on the most energy efficient framing techniques, consult the advanced wall framing technology fact sheet published by the United States Department of Energy. 

ALTERNATIVE FRAMING MATERIALS 

There are alternatives to conventional ‘stick built’ or wood stud including steel studs and structurally insulated panels (SIP) 

STEEL STUDS 

The advantages of using steel studs over wood studs makes them a compelling option for framing a conventional home. For tiny houses, however, the negatives often outweigh the benefits. 

The biggest downfall of metal framing is that screws are required to attach the interior siding. For a conventional home, where drywall is used, this is not an issue. However, in tiny houses drywall is not typically used and most alternatives quire nail fasteners. To get arum this, propel have sheathed both the exterior and the interior of the walls with plywood to provide a nailing surface for the siding. This workaround is not ideal because it is heavy, expensive and labor intensive. 

Even when a house is framed with steel studs, it is common for the kitchen and bathroom walls to still be framed with wood in order to provide a stronger mounting point for the cabinets, considering the relative size of the kitchen and storage cabinets in a tiny house, wood framing or SIPS are recommended over steel framing. 

STRUCTURALLY INSULATED PANELS (SIPS) 

Sips consist of a solid form core insulation, sandwiched between two sheets of structural facing, typically oriented strand board (OAB). The panel core is solid and does not contain framing members, so there is no wood to act as a thermal bridge. This makes sip one of the most thermally efficient wall systems available. 

SIPs are made by a manufacturer off-site, based on your plans. Even if your plans are not specifically made for SIPs, the manufacturer can still use them to design your walls. The downside to this approach is the any problems or issues with the panels can cause a significantly delay while replacement panels are manufactured and delivered.  

Another consideration when using SIPs are the electrical and plumbing systems. The panel manufacturer can add ’chases’ or channels for the wires so the switch and outlet locations will need to be provided to them as well. The plumbing should not be run thought the interior of the SIPs. Plumbing will either need to be run through the floor or strips of wood will need to be placed along the interior of the wall to create a surface chase. 

The cost of SIPs is normally more than conventional wood framing, but the labor savings and long term efficiency make this a worthwhile option. 

CAPTURING AND DOCUMENTING YOUR DESIGN 

There are several different options to capture and document your design. These range in price from free to thousands of dollars. Since the free tools that are available are more than adequate for this job and are easier on you budget I will focus on them. 

INTERIOR CHANGES
INTERIOR CHANGES

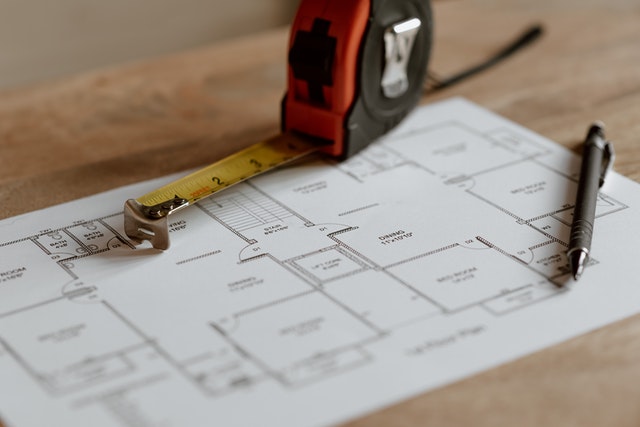
The most obvious of these options is a pencil and paper. When starting from scratch, I highly recommend beginning with a simple sketch. A sketch is great for quickly capturing your ideas and is very easy to make changes to, unlike a more complicated model in a design program. The sketch can simply be a floor plan that can be used to determine where the door(s), windows, bathroom, and kitchen should be. Try to keep the items in your sketch as close to scale as possible. I have seen people who have fit a tremendous amount of furniture and cabinets into their design by drawing things smaller. While that may look great on paper, it does not translate to real life unless you plan to use miniature furniture in your finished house. 

The sketch can also be used to help determine the external appearance, since the interior design will dictate the window placement. 

While the entire design can be captured and built form hand drawings, there are significant advantages to using a design and modelling computer program to convert your sketches into plans. The program that we recommend and use    ourselves in Trimble Sketch up. This basic personal use version is free. Trimble Sketch up is a 3D modelling program that is incredibly easy to learn; however, if you openup the program and start with a black canvas it can be intimidating. I recommend that you star5 with a sample model of a tile house to get feel for how the model should be constructed. These can be found online for free and are included with several paid plan packages, including the ones offered by tiny home builders, by using a program that models your house in 3D, you get a unique perspective and get to see how all the different components fit together at scale. It is highly beneficial to see your design in 3D from an aesthetics perspective too. There have been several times where I sketch something and think it will look great, only to model it in 3D at perfect scale and discover that if does not look as good as I initially thought. 

More importantly, having a 3D model of your house allows you to instantly determine measurements of any components in the house during construction. This can be very helpful, since architectural drawings and plans do not show every measurement. Many measurements must be derived by adding or subtracting other. 

EXISTING DESIGN  

Because of the size constraints, the options for the layout of a tiny house are limited. For instance, the front door can only be placed on either the cack of the trailer or on one of the sides. If it is placed on the side of the house it will most likely be off-center because of the trailers fenders. If it is placed on the back of the house it will either be centered are along one of the edges. With these limitations, there are fewer design combinations than with traditional houses, the benefit is the there is a good chance a set of plans already exist for the general design you have in mind. 

Settling on an existing design is the easiest, least time consuming, and most affordable option, with existing plans, there is no need to learn how to use a new design program or to be concerned if the house is framed properly and structurally sound. All of that has already been done for you. Depending on how you value your time and the cost of the plans, this option can be significantly cheaper than designing a house yourself.  

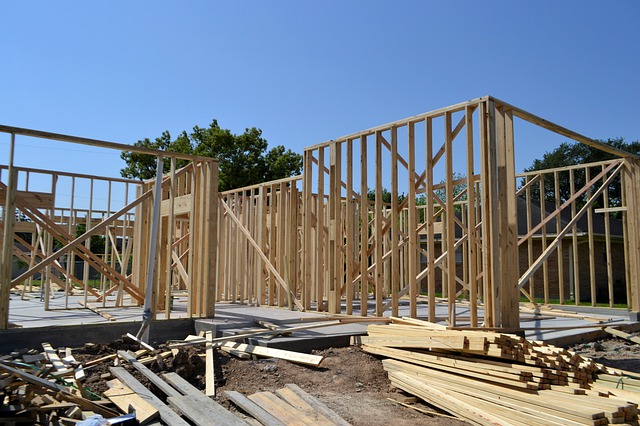
Another advantage to using an existing design, particularly if at least one house has been built form the plans, is that many of the kinks have likely already been worked out. Often a design may look good on paper, bout once it is built, it maynot be as practical or as functional as initially believed. For instance, the first house that was built by tiny home builders included a storage loft above the bathroom. Since it was mall and would not carry a verylarge load, 2x4s were used instead of 2x6s for theloft joists. This ended up being a poor decision as few recessed lights or bathroom exhaust fans and designed to fit in a 3 ½ inch ceiling cavity. In this particular case, the fix was not very difficult, but it still took time and would have gone undiscovered in the plans had the house not actually been built. 

Another benefit to buying plans a house that has already been built is that you get to see what it will look looked when it is completed. Just as designs may not be as function on paper, they may not look as good in real life either. 

Finally, another benefit is that some palms come with additional valuable information like a materials list. In the building material chapter, we will discuss how this can save significant amount of time and money, essentially reducing or negating the cost of the plans. 

The disadvantage of using an existing design is that it may not be exactly what you want, and depending on how easy it is to modify, compromises may need to be made. 

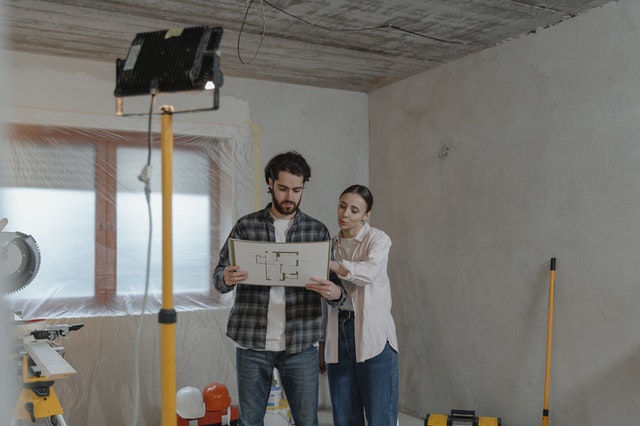
CUSTOMIZING AN EXISTING DESIGN 

If you are only able to find a design that is close to what you want, but not exact, you maybe able to t customize it to if it your needs, most plans are primarily framing plans, so changes to the exterior, including window and door locations, will require the most rework, interior changes that work with the existing window and door placement, may not require any changes to the plans at all. 

EXTERIOR CHANGES 

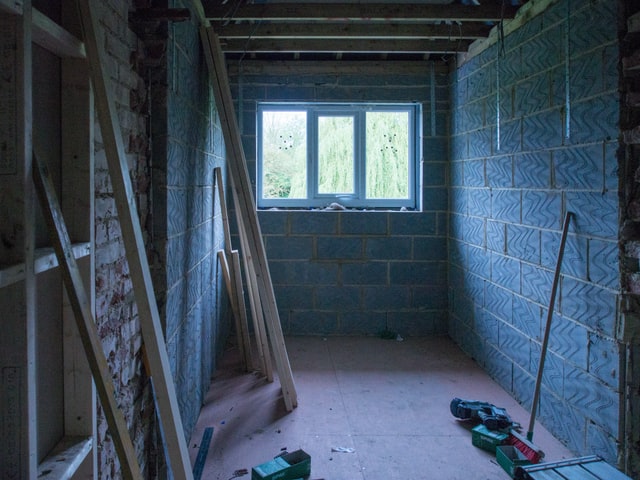
Some minor framing and exterior customizations con be made to a design without making changes to the plans. These changes can be done during a house’s construction and are called site modifications. An example of this type of change might be the removal of a window or even a slightly more difficult alteration, like shifting the location of the cut-out in the subfloor for the fenders. While not having the plans exactly the way you want them before you begin construction is not optimal, with care and special attention they can still work. 

If the plans that you purchase are provided to you in a format that can be easily modified, you will have a lot more flexibility with the changes that you can make. For instance some plans are only available in print or PDF format, which is not modifiable. To make changes to these plans, the design would need to be recreated in a drafting program and then changed. If the plans you purchase include an AutoCAD or SketchUp file. Changes can be applied with minimal effort and time. If your intention is to modify a design, inquire about receiving the plans in a charge friendly format. 
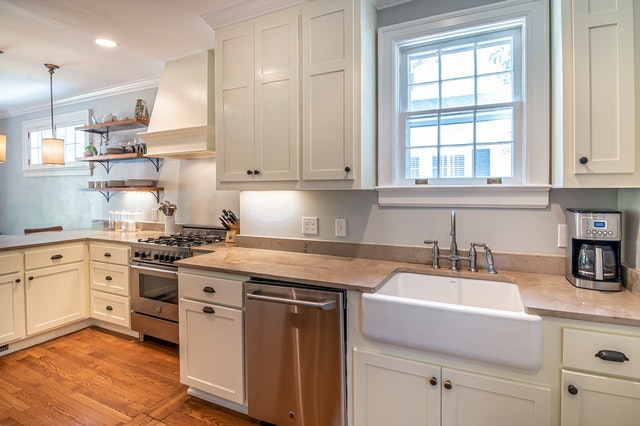
INTERIOR CHANGES 

The framing of a house is primarily linked to the layout of the house through the window and door placement. For instance, if a kitchen is anticipated to be in a certain location, it will likely have a window positioned above the sink. If you decide to move the kitchen to another wall, you will need to ensure that any windows on that wall will not interfere with the cabinets. Most interior changes, other than those to the kitchen or bathroom, are simple to make and will not require formal changes to the plans. 

Design and Plan tiny home

(650) 249-9744


[contact-form-7 id=”54″ title=”Quote Form”]

Leave a Comment

Your email address will not be published. Required fields are marked *