Casting in sand
This is an excerpt from the Book called “Easy Concrete 43 DIY projects for home & garden ” by Malena Skote . Continue reading to learn more about Casting in sand, thanks to the author.
Wet sand can be shaped by your hands as easily as castles and other short-lived sculptures on the beach. Making molds out of sand for concrete casting is also cheap, and once you are finished with the mold you simply brush or rinse away the sand.
Concrete surfaces that are cast against sand will be somewhat rough and a little creased, which creates a weathered look. You can cast bowls and plates over mounds of sands and also in depressions of sand. You can use any kind of sand as long as it’s wet.
Hanging Birdbath
Mold
Wet sand
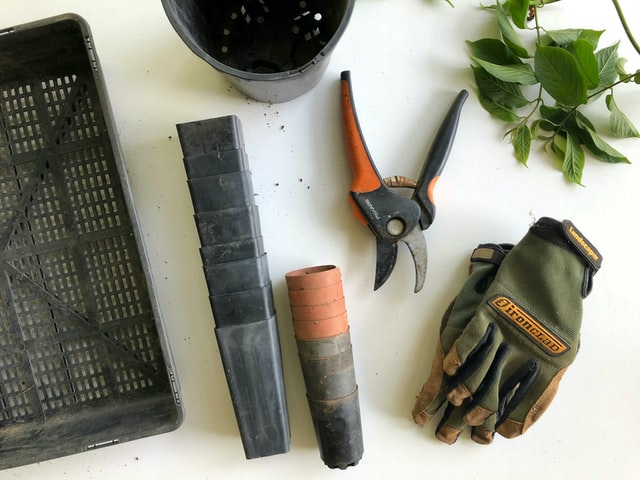
Materials
3 corks from wine bottles
Fine concrete
Oxide red pigment (optional)
Rope, 5/8 inch (1.6cm) in diameter and approximately 60 inches (1.5m) long
Tools
Mixing pail
Trowel or steel putty knife
Plastic sheet
Instructions
1.Working directly on the ground or on a durable or plastic-covered workspace, make a round mound out of the wet sand and shape a flat edge of about 4 inches (10.2cm) around it. The mold should look like a hat with a round brim.
- Place the three corks evenly spaced around the flat edge. This will create the holes for the rope.
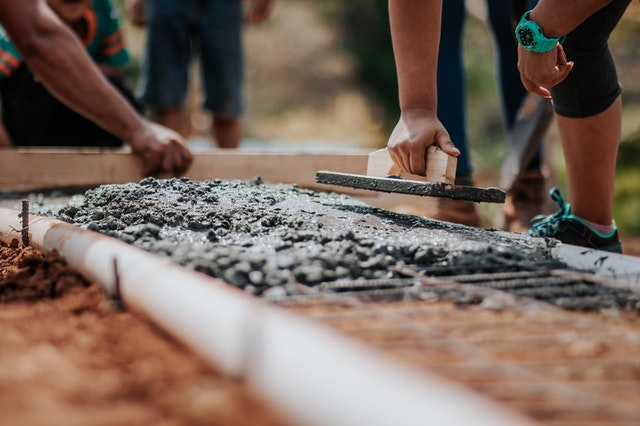
- Mix several quarts (liters) of dry concrete with a small amount of water, adding a little at a time until it has the consistency of cooked oatmeal and is neither crumbly nor runny. Mix in the red pigment, if using. Less than a tablespoon (15ml) is usually enough to turn the concrete red.
- Wearing rubber gloves, shape a ¾-inch (1.9 cm) thick layer of the concrete mixture over the sand mold. Pat it lightly with your hand in order to get rid of any air pockets between the sand and the concrete and also to smooth out the surface. Even out the edges using the trowel or putty knife. Cover with the plastic sheet and leave the birdbath to harden for two days.
5.Turn the birdbath over and brush or rinse away the sand. Carefully push out the corks. Cut the rope into three equal lengths, make sturdy knots at one end of each length, and thread the other end of the rope through the holes made by the corks.
Boat-Shaped Bowl
Mold
Wet sand
Materials
Fine concrete
Large dandelion leaf or other decoration (optional)
Liquid gold leaf (optional)
Tools
Marker pen
Mixing pail
Trowel
Plastic sheet
Instructions
1.Working on a piece of wood or on a plastic-covered work surface make a mound out of the wet sand and shape it like an upside-down boat.
- using the marker pen draw a line around the mound about ¾ inch (1.9 cm) away from the edge. When the concrete is shaped it should reach this line but not cross it. It may be difficult to achieve an even thickness all the way around the bowl but the line should help.
- Mix several quarts (liters) of dry concrete with a little water until it forms a viscous paste that is neither runny nor crumbly. It should be moist all the way thr4ough but still stick together. If you are using the dandelion leaf or other decoration lace it diagonally on the sand mound with its back facing outwards.
- Wearing rubber gloves shape a layer of concrete about ¾ inch (1.9 cm) thick over the sand mound. Even it out as much as possible with your hands or use a trowel. Flatten the surface at the top of the molded concrete so that the bowl will stand steady when placed upright. Cover with the plastic sheet sand leave to harden for two days.
- Turn the bowl over, brush away the sand, and remove the leaf. Paint the stem of the leaf using the liquid gold, if desired. To make this umbrella stand, use the base of a “lathed” plastic urn. Turn the urn upside-down and press it into moist sand to make an impression of the shape of the urn.
Use a cardboard tube to make the hole with diameter that is somewhat larger than that of an umbrella. Alternatively, cast a metal roll into the umbrella stand.
Umbrella Stand
Mold
Large sturdy cardboard box or plastic tub, large enough to fit the plastic urn stand inside
Wet sand
Plastic urn stand
Cardboard or metal tube, with a diamete4r that is somewhat larger than that of an umbrella
Materials
Fine concrete
Tools
Mixing pail
Trowel
Plastic sheet

Instructions
- Fill the cardboard box or plastic tub with wet sand. Push the plastic urn stand down into the wet sand and then carefully pull it out. Place the cardboard or metal tube into the middle of the imprint.
- Mix several quarts (liters) of dry concrete with a little water until it forms a viscous paste, referring to the instructions on the packet. Carefully pour the concrete into the impression, holding the paper/metal tube steady so it doesn’t lean sideways. Cover with the plastic sheet and leave the concrete to harden for two days.
- Remove the concrete stand from the sand. Remove the tube and brush or rinse the sand away.This double birdbath was made on top of two mounds of sand. The mosaic pieces were placed around it and a little edge of clay stopped the concrete from running out onto the work surface. In this way, the concrete mixture could be made fairly loose so it would run out between the mosaic pieces. As an experiment, white pigment was scattered directly onto the sand before the concrete was placed on top.
Double Birdbath
Mold
Wet sand
Mosaic pieces
Pottery, sketch, craft, or modelling clay
Materials
Fine concrete
Tools
Mixing pail
Trowel
Plastic sheet
Instructions
- Working on a piece of wood or directly on a plastic-covered work surface, make two even mounds of sand and even out the surface. Place the mosaic pieces around the mold, good side down.
- Press a border of clay around the outside of the mosaic pieces.
- Mix several quarts (liters) of concrete powder with a little water until it forms a viscous paste. Place a ¾-inch (1.9 cm) thick layer of concrete onto the mounds and the mosaic pieces. Cover with a plastic sheet and leave to harden for two days.
- Turn the birdbath over and brush or rinse the sand away. If any of the mosaic pieces come loose, glue them in place with an adhesive designed for outdoor use.